Comparing the outcome to my expectations and planning I am very pleased with the final result, all of the targets I aimed to fulfill have been successfully completed, for example the full 60fps framerate was achieved and the video looks very smooth and visually attractive. I believe the video is fit for purpose and fills the requirements of a challenge video to a high quality. I managed my time correctly to ensure the video editing had an adequate amount of time as well as other aspects like filming and planning.
Editing Log
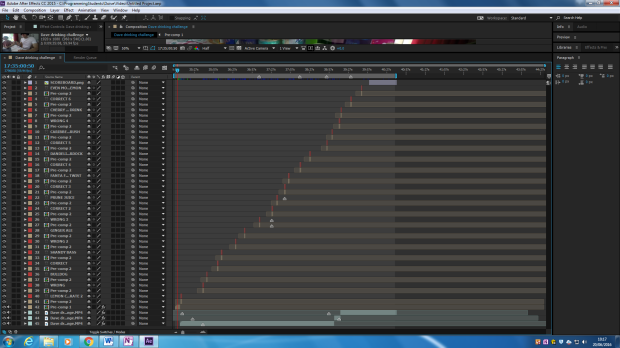
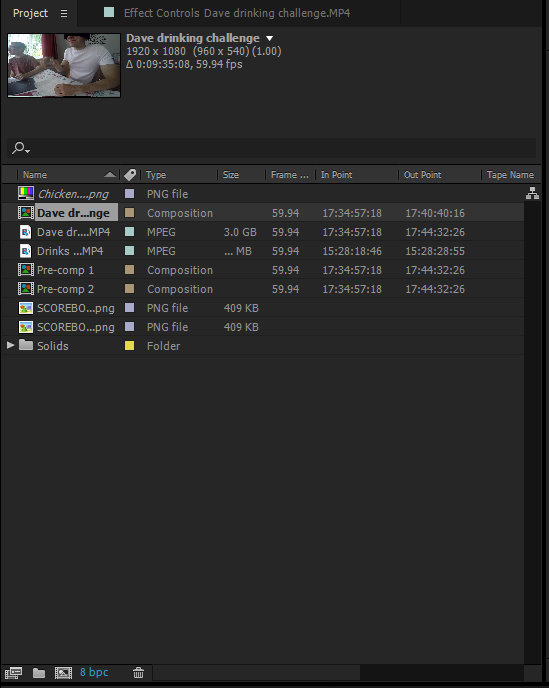
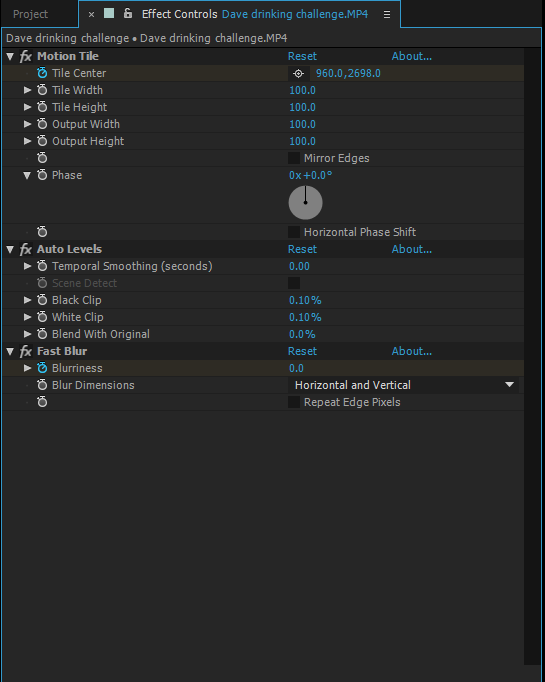
The video editing took place in Adobe After Effects because it’s my program of choice, our source footage was uncompressed and large but this wasn’t a problem because the final render would be efficiently compressed. Setting up the composition involved me selecting the correct resolution and framerate in composition settings. Firstly I wanted to show a pan of all of the drinks we used, we had recorded this cinematic but it wasn’t very smooth and often stuttered. To resolve this problem I used the “Warp Stabilizer VFX” this allowed me to track the motion of the camera and move the video accordingly to provide a very smooth motion, I was pleased with the result. Next I placed my graphic that I had previously produced in Adobe Illustrator, using the opacity tool and keyframes I had the graphic fade in to create an introduction for my video. I used motion tile to create a visually attractive transition to the main video.
For the main portion of the video I cut the footage down to only include relevant footage, I cut down the footage and I was left with a result I could edit. For the challenge I used an on screen display informing the audience what drink I was trying, this popped up at the bottom and was animated in and out with keyframes. I also used this animation to display if I had got the task wrong or correct. Throughout the video all of these graphics popped up in the correct order to inform the audience what happened.
To finish the video I used “Smart Blur” to slowly animate the video becoming blurred, once the video was fully blurred I faded in the Scoreboard I illustrated before. The Scoreboard was a .png that supported transparency and perfectly layered on top of the video. The scoreboard showed everyone’s final scores, and a thumbnail of their face. Finally I colour corrected the video using the “Curves” tool to correct individual colours, “Brightness & Contrast” to correct the brightness, I also used the “exposure” tool because a window was in the scene, the exposure tool allowed me to correct the lighting. After the video I was colour corrected I faded the video to black and faded the audio using opacity, and the audio settings.
The next step was rendering, I added the composition to my render queue, from this point I used Adobe Media Converter to render the video because I know it’s much more effective than After Effects for rendering. In Adobe Media Converter I selected H.264 and .MP4 because this is the standard file format for video production, I also tweaked the bit rate to make a perfect balance between quality and filesize. The audio settings did not need modifying at all, I rendered the video to my computer and I was finished.
Subtitles
The video will be uploaded on YouTube, this means we can leave it to YouTube to accurately generate and apply subtitles to the video where needed, or we can supply our own subtitles to ensure they are 100% accurate. The YouTube platform allows us to effectively use subtitles on our videos providing us a wider audience.
The use of subtitles allows our videos to be watched by those who are hearing impaired, they also allow search engines to search through our content and attract the correct audience.
Codecs
For our production to be viewed by our audience in a high quality in a variety of environments we must ensure we use a codec that gives a high quality video but keeps it compressed enough to be an acceptable size to stream and watch.
I have chosen to use H.264 Codec because it keeps the production looking great at a high quality with minimal visual artifact and keeps the video size low enough to be acceptable for the length and resolution. H.264 basically produces videos that look good at a small file size, this codec also allows the use of the .MP4 video format which is the standard video format that will be accepted anywhere for media sharing and playback. Any video player will be able to handle a .MP4 file currently as it is the widely accepted format for videos.
Software
To edit our production we will be Adobe After Effects only because I have a lot of personal experience with this program and it’s my program of choice for editing video. After Effects provides me with a program that is capable of everything I need for video editing from colour grading to sound design. After Effects is capable of everything we need and I believe it’s the most appropriate, it can also render out to a variety of formats and codecs we may need for our production.
For any on screen graphics or illustrations I will be using Adobe Illustrator to produce the designs before exporting them to a .PNG file and placing them over the video appropriately in After Effects. Illustrator allows me to produce high quality vector graphics that look visually appealing and are compatible with After Effects for editing.
Sound
We will record the sound using microphones provided by our cameras, we will then review the quality of the sound and decide if we need to re record the sound with better microphones in a different environment. Any additional soundtracks or effects will be edited in after the recording takes place using Adobe After Effects.
Adobe After Effects allows us to edit the sound effects to our specification with tools such as the pitch and overall volume. After Effects also allows us to layer the sound effects in the correct place so they work with the video playback when being watched.
Cameras
We will be using two cameras for our production, firstly we have a GoPro Hero 4 that is able to record 1080p at 60 fps or higher resolutions at lower framerates, we also have an iPhone 6s that is able to record at 1080p 120fps or 4K 30fps. For both cameras we have to choose between resolution and framerate, however both of them shoot a framerate of 60+ at 1080p which means we are able to slow down footage while keeping the video smooth. Both of our cameras meet our needs for resolution, framerate and quality so we will have no problem recording the content.
Having two cameras that meet our needs allow us to have separate unique angles to the video where we can cut to different angles depending on what’s happening in the video. Both cameras will provide a high quality video with an adequate framerate that makes it possible to change the speed when editing the video.
Resolution & Framerate
For our production the resolution and framerate is very important for the quality and intention of the final outcome. As I have mentioned earlier we will be using a 16:9 aspect ratio, this means our production can be recorded in 1920 x 1080 or 1280 x 720. We will record in 1080p because it’s standard for HD content and for the type of content we are producing it is the acceptable resolution. Also most displays such as TVs or Monitors run a 1920 x 1080 resolution so this video will work perfectly on most devices. 1080p is also a much higher quality than things you’ll see on TV so our production will look sharper and more defined.
Framerate is also important, ideally we would be recording in 120fps because this will make it easier to slow down and show more important detail. I believe the high frame rate is important for the nature of our video because it means we can show the content slower so it’s easy to see what’s going on and important details are not missed. The final video will be rendered in 30fps so a 60fps recording will be useful but 120fps would help to achieve a much higher quality. A challenge video can often be based upon reactions and the ability to slow down the video enhances the quality of entertainment we produce.
How and where the video could be viewed
The video will be recorded and rendered in a 16:9 aspect ratio because this the most common ratio across most devices such as computers, tablets, mobile phones. The 16:9 ratio allows us to use either 1080p or 720p resolution and keep the functionality perfect across all devices. Devices running recent operating systems on decent hardware will be able to display these videos with no problem. Systems such as Windows, Linux, Mac OS, iOS, and Android to name a few will easily be able to playback videos at this resolution.
I have covered where the video would be viewed but how could I make this possible, as the main platform I have chosen YouTube because it allows easy and smooth playback across a very wide variety of devices. YouTube is accessible through many different forms, a TV or game console can now easily access YouTube which brings my content to a lot of people as it makes it easy for them to view. Devices with an internet connection can access YouTube and easily watch content I produce. The video could also be stored and moved locally, this eliminates the need for an internet connection and means the video will not suffer the compression that YouTube uses to make the videos accessible.
Scenario
We are producing a video about a challenge of consuming drinks and food, I have been researching through the current market on this topic. Throughout my research on this genre of video I have found them to me quite successful, many YouTube challenge channels/shows feature some variation of a challenge for entertainment. Due to the nature of this content many find it entertaining and numerous. I believe the reason challenge videos gain popularity is the often outrageous challenges performed, and as I have said people watch this for entertainment and comedy.
An Inspiration for our challenge would be a popular YouTube channel called “TGFBro”, they upload challenges to their channel that are often painful and crazy but a lot of people including myself find this funny. They now run a successful youtube channel with over a million views on every challenge video they upload, they are also approaching 1 million subscribers so many would say this a success. For such a successful channel the equipment they use is simple, just a hand camera and fairly cheap items that can be found in a supermarket. For the simple set up the outcome of the videos are always to a high quality of entertainment, this claim is enforced by the support they receive through views, likes, comments and subscribers.
